How to Bench Press 101: Your First Rep to Your Best Rep
The foundational guide to learning the barbell bench press from scratch.
By Dhiren Dunraj MSc
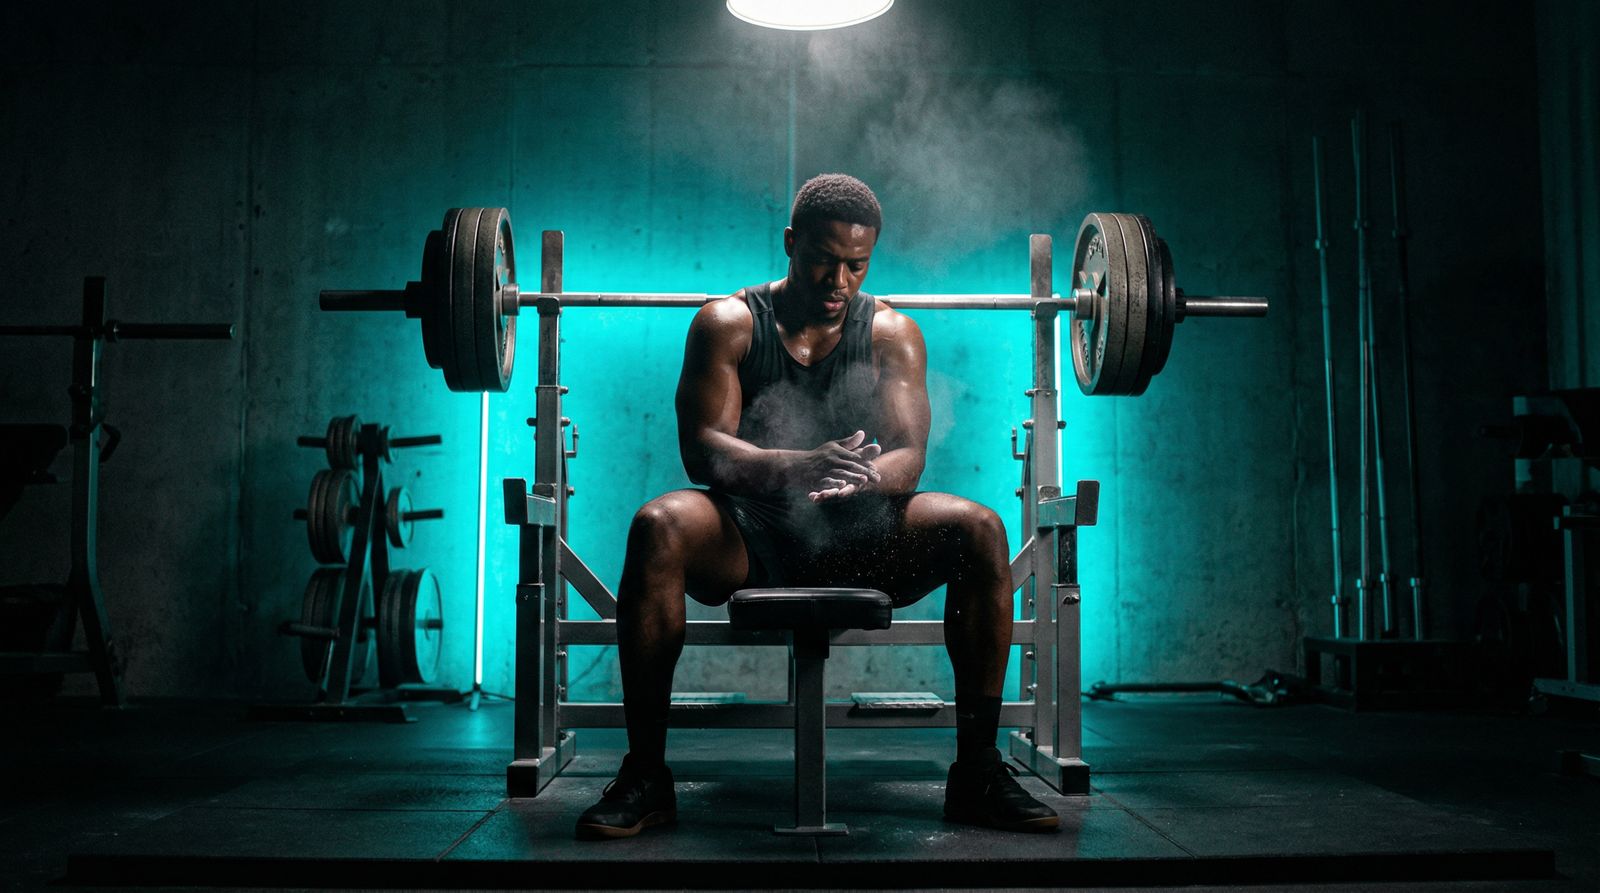
Key Insight
“The bench press is a full-body skill, not a chest exercise, and you either own the technique or the technique owns you.”
The bench press is the most ego-laden lift in the gym. It's also the most technically misunderstood. The two problems are related. Fix the technique and the ego sorts itself out, because you'll be lifting more. Significantly more, not slightly more, because the bench press, done correctly, is a full-body skill, not a chest exercise you grind through. Your feet, legs, back, and shoulders are all working simultaneously, and the chest is just one member of an orchestra you've barely started to conduct.
This is the blueprint and your starting point. Read it before your next session, then let your body learn what your mind already knows.
What the Bench Press Actually Is
Before you lie down on a bench, understand what you're doing. The bench press is an upper-body pressing movement where you lower a barbell from arms-length lockout to your chest, then press it back to lockout. Simple to describe, demanding to execute.
The primary movers are your pectoralis major, triceps brachii, and anterior deltoid. But to execute the lift safely and with maximum force, your legs are driving into the floor, your back is creating a rigid foundation, your lats are engaged, and your entire torso is braced like a hydraulic cylinder under pressure. The lifters who understand this press more. The ones who don't are stuck doing endless sets of moderate weight wondering why their bench isn't moving.
There is only one type of bench press in this article: the barbell flat bench press. Dumbbells, cables, and machines have their place. The barbell bench press defines pressing strength. Learn this one first.
Equipment: What You Actually Need
Don't overcomplicate it. To bench press well from day one, you need:
A bench: Adjustable or fixed. The bench pad should be stable, not wobbling, not compressing excessively under your weight. Sit on the edge of the bench and test it. If it feels like a marshmallow, find a different bench.
A power rack or squat rack with J-hooks: The bar needs to start at the right height. Set the J-hooks so that when you lie down and extend your arms to the bar, your elbows have a slight bend. Not fully locked out, not a long reach up. You want the unrack to be a short press-out to clear the hooks, not a stretch or a jerk.
Shoes: Flat, hard sole. Chuck Taylors, Vans, or deadlift slippers work well. You want your feet to connect solidly with the floor, not balanced on a compressed cushion that shifts under you as you press. The floor is your base. Treat it accordingly.
Chalk: Optional for beginners, but valuable. It prevents the bar from slipping in your hands and signals your nervous system that the bar is fixed and secure. More grip security means more force production. Use it when your gym allows it.
A belt is not necessary at this stage. Learn to brace without one. A belt amplifies your brace. It cannot replace it. Using one before the brace pattern is ingrained is like putting a turbocharger on an engine before you've checked the fundamentals. The power goes nowhere useful.
The Setup: Before You Unrack
The lift begins the moment you approach the bench, not when you unrack or when the bar touches your chest.
Lie down with intention. Position yourself on the bench so that your eyes are directly beneath the bar, not behind it or in front of it. This is your starting reference point. When the bar is over your eye line, it will travel out of the hooks cleanly without pressing into the uprights or requiring a forward reach.
Set your shoulder blades first. This is the single most important setup cue in the bench press. Before anything else, retract your shoulder blades (pull them together, toward your spine) and depress them (pull them down, away from your ears). Imagine you're trying to put your shoulder blades into your back pockets. When your shoulder blades are properly set, your upper back creates a stable, rigid shelf that your whole press will be built on. Lose the shoulder blade position and you've lost the foundation.
The arch. A slight natural arch in your lower back is correct and healthy. When your shoulder blades are properly retracted and depressed, your chest rises, your upper back presses into the bench, and a natural gap appears in your lumbar region. This is how the spine sits when the upper back is properly set, not cheating. Don't force an exaggerated arch as a beginner. Set the shoulder blades first. The arch follows naturally. Your glutes and feet will remain on the bench and floor respectively throughout every rep.
Foot position. Flat on the floor, planted firmly. Feet are force production, not decoration. Your foot position should feel stable and grounded, typically about hip-width apart or slightly wider, feet flat, driving down into the floor. Some lifters prefer a slight heel elevation for comfort, but for beginners, flat feet on the floor is the foundation. Drive your feet into the ground before every rep and maintain that drive throughout the press.
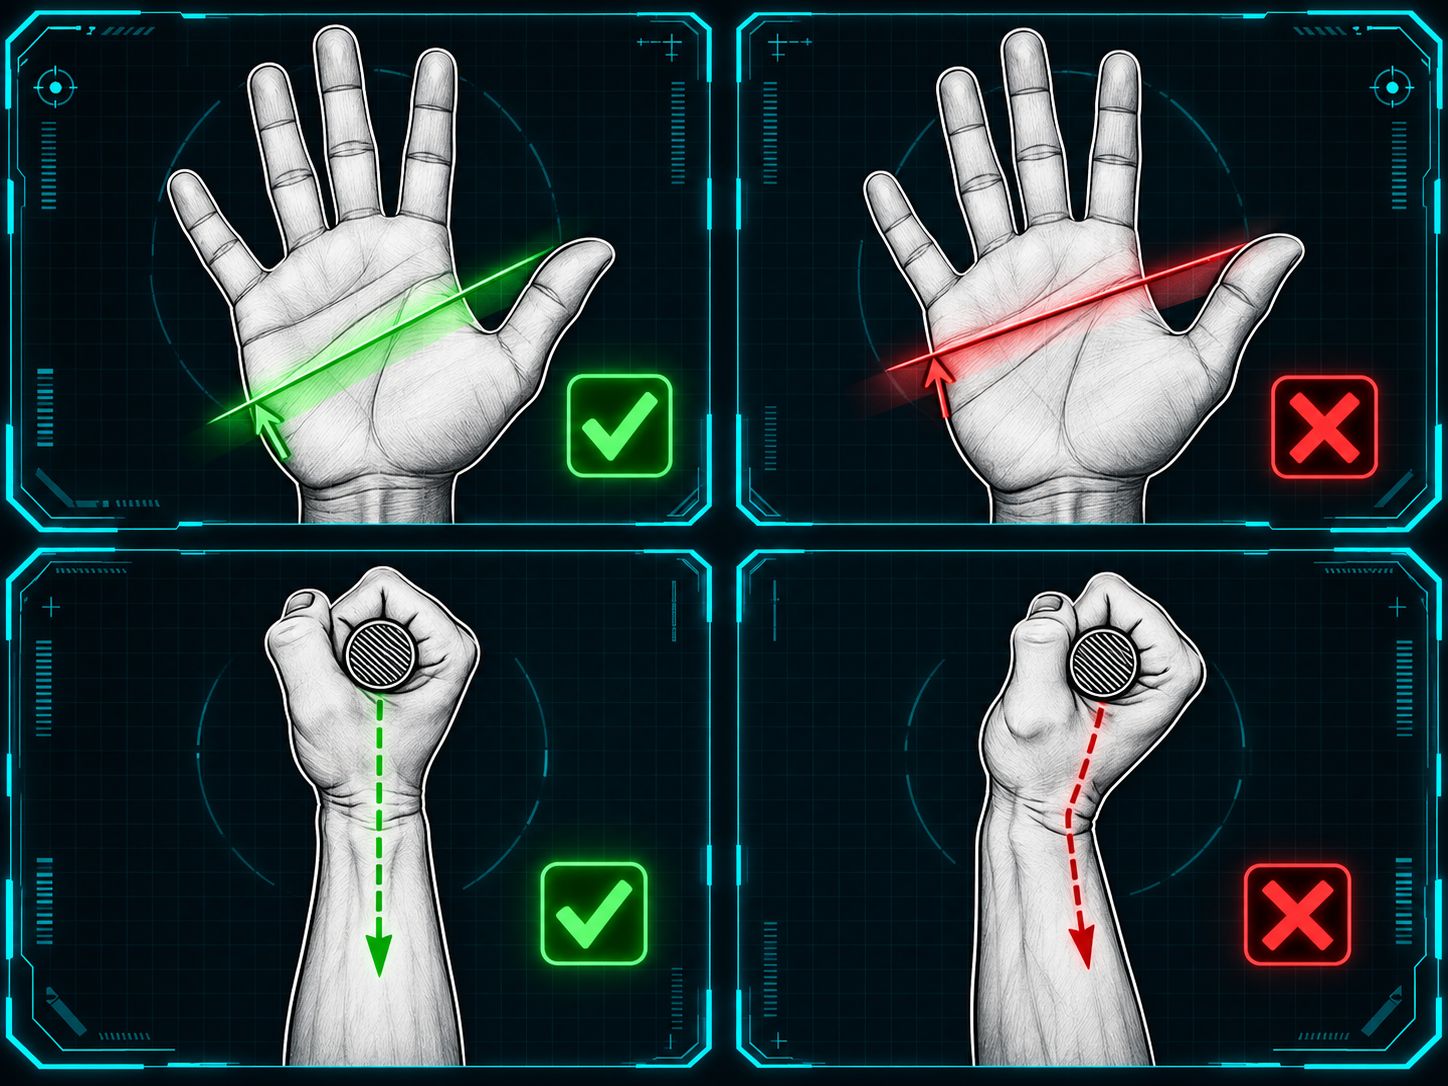
Grip. Wrap your thumbs around the bar, always. A thumbless grip is called a suicide grip for a reason. Your hands should be positioned so that when the bar is at your chest, your forearms are approximately vertical, stacking the wrist directly over the elbow [1]. A common starting reference point is to place your pinky fingers on the ring markings of the barbell, then adjust from there. Most beginners find their optimal grip slightly inside the rings. Close enough that the wrists stack over the elbows. Not so wide that the elbows flare out perpendicular to your body. Squeeze the bar hard. Your grip determines your stability. Weak grip, unstable press.
The Unrack: A Press, Not a Yank
The unrack is its own skill. Many beginners waste energy and compromise their setup before the rep even begins because they don't treat the unrack with the precision it deserves.
Before you unrack: Take your breath. Full breath into your abdomen: belly, sides, lower back. 360 degrees of air. Brace hard against it, like someone is about to punch you in the stomach. Your torso is now pressurised. This intra-abdominal pressure protects your spine and creates a rigid base for force transfer. Take this breath and lock this brace before you touch the bar, not after.
The press-out: From your setup position, press the bar straight up and out of the J-hooks. Rather than lifting the bar upward by bending your elbows, you're pressing it forward and up, out of the hooks, in the same direction it would travel if the hooks weren't there. The bar should clear the hooks cleanly and travel forward until it's stacked directly over your shoulder joints. That's your start position for the descent.
With a spotter: Communicate before the unrack. Tell your spotter you're ready. The standard protocol is a count ("three, two, one"), and the lifter initiates the unrack while the spotter assists with a finger or two under the bar. The lifter controls the bar. The spotter just guides it out of the hooks. Once the bar is over the start position, the spotter steps back.
Without a spotter: Make sure the J-hooks are set at the right height. Do a dry run: lie down, press up to check the height, re-rack, then set up fully. Never press a heavy single without a spotter or safeties set at the right height. The safeties on a power rack should be set so that if you fail with the bar on your chest, it can rest on the pins without crushing you. Set them every time.
The Descent: A Diagonal, Not a Drop
The bar does not travel straight down to your chest. It travels along a slight diagonal, controlled, deliberate, and determined by your shoulder joint anatomy. From the start position (bar over shoulder joints at lockout), the bar descends toward your lower chest as you lower it, not toward your neck or your belly button. Your lower chest, just below the nipple line for most lifters with a standard setup.
This diagonal path is what happens when the shoulder joint rotates correctly, not a choice. The bar follows the arc of the shoulder. Trying to press straight down produces a mechanically awkward path that loads the anterior deltoid at its most vulnerable point. Let the shoulder joint determine the bar path. Your job is to keep the bar moving smoothly along that path.
Descent speed: Approximately two to three seconds. Controlled, neither a crash landing nor an agonisingly slow crawl. You're in command of the bar at every point in the descent.
Touch point: The bar should touch your lower chest, just below the nipple line is a reliable reference for most beginners with a standard setup and grip. The bar should make contact. It does not bounce or crash. It touches and pauses, or touches and immediately reverses (more on that below).
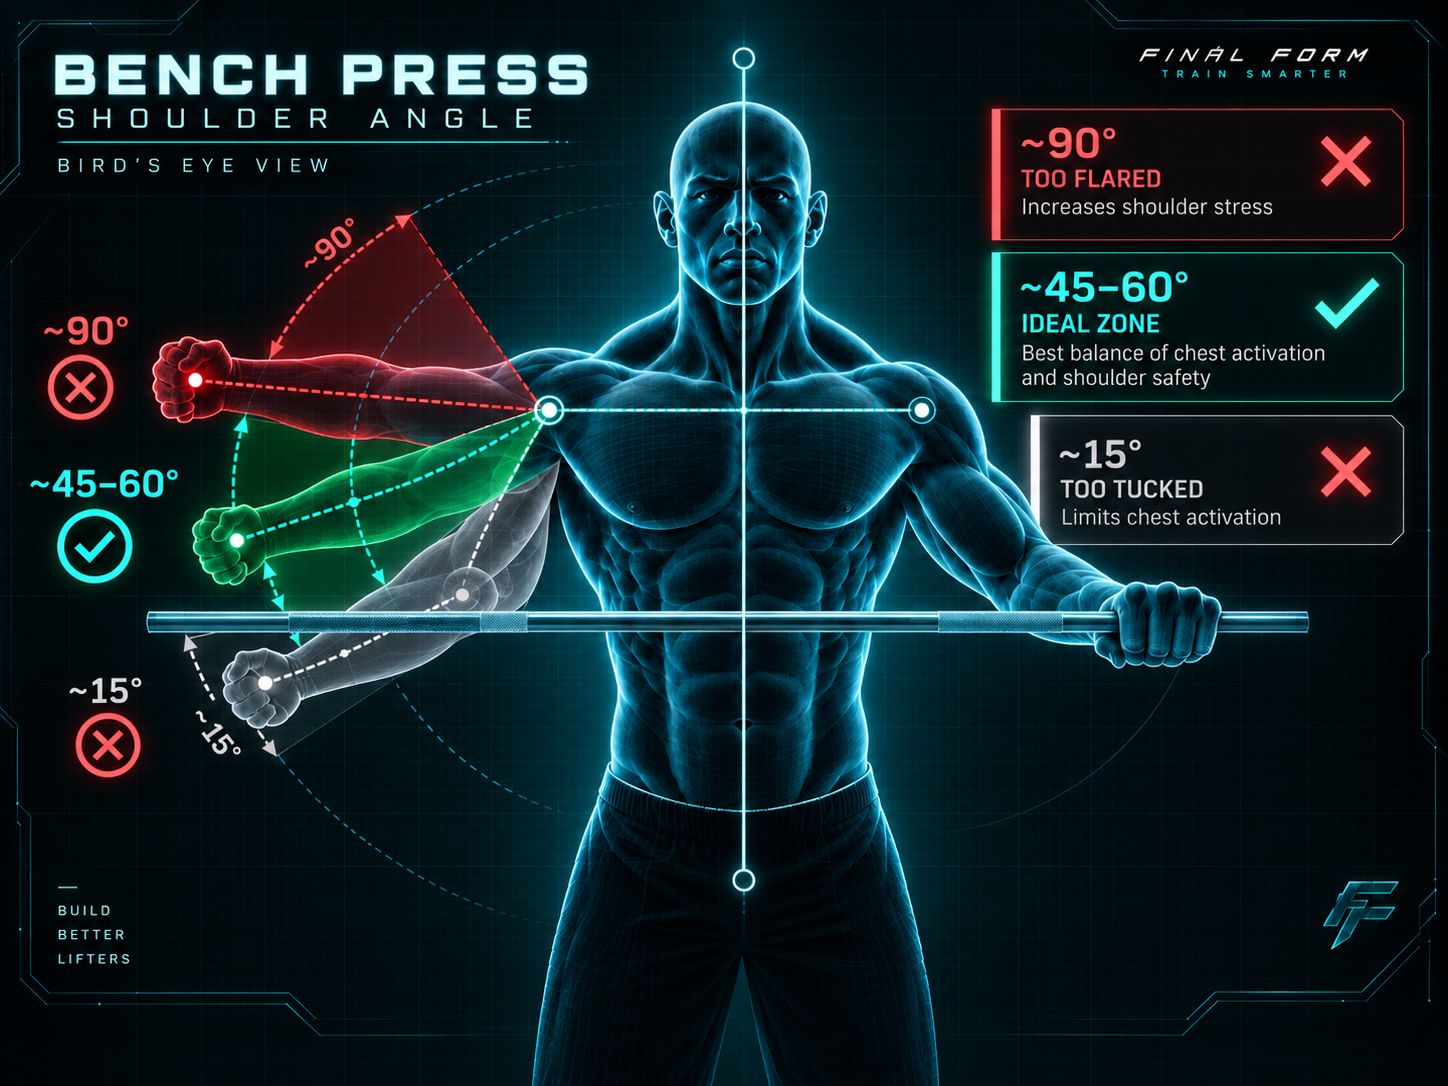
Elbows: As you lower the bar, your elbows will track below the bar, angled at roughly 45 to 60 degrees from your torso, not perpendicular to your body like a classic "hands up" position. This is the safe angle. Elbows flaring out to 90 degrees maximises anterior deltoid stress and is the primary mechanical cause of bench press shoulder injuries. Let the elbows track naturally inward as you lower the bar.
Touch-and-Go vs. Paused: Know the Difference
Two versions of the bench press exist for good reason. Both are valid, and they have different uses.
Touch-and-go: The bar touches the chest and immediately reverses. The elastic energy stored in your pectoral tissue and the reflex of the stretch-shortening cycle assists the initial drive off the chest. This is faster, feels more natural for beginners, and allows more weight to be moved. It's also the version where beginners are most likely to bounce the bar, which is different from touch-and-go, and which is wrong. A controlled reversal uses the elastic energy of a controlled touch. Dropping and bouncing uses impact energy from a drop. The bar should not visibly compress your chest.
Paused: The bar is lowered to the chest and held there, still, controlled, no movement, before being pressed. The pause eliminates all elastic energy assistance. The press begins from a dead stop. This version is harder. It requires greater strength out of the bottom position. It's also the version used in competition. A judge gives the press signal when the bar is motionless on the chest. If you intend to compete, train paused bench regularly from the beginning. Even if you don't, paused bench at moderate intensity is one of the best technique teachers available.
For your first sessions: use touch-and-go at moderate intensity. Introduce paused reps once you've grooved the descent. Practise the pause at lighter weights, 60 to 70 percent of your current working weight. The pause will expose weaknesses you didn't know you had.
The Press: Drive Back Along the Arc
The bar has touched your chest. Now press.
Drive the bar back along the same diagonal it descended: up and slightly back, toward the rack, finishing over the shoulder joints at lockout. This is not a conscious navigation task. If your bar path was correct on the descent, the ascent path follows. Your job is to press with everything: legs driving into the floor, back tight against the bench, lats engaged, chest and shoulders pressing the bar through the arc to lockout.
Lockout: Arms fully extended. Not hyperextended. The elbows lock out, but the shoulders remain set, the blades still retracted and depressed. Don't let the shoulder blades shrug forward at the top. Own the lockout position before initiating the next rep.
Breathing between reps: Re-breathe at the top, between reps, not mid-rep or at the bottom. Take a full breath at lockout, brace, then descend again. Every rep has its own locked brace. If you're breathing mid-rep, you've lost your primary spinal protection. Train the breathing pattern from session one.
The Re-Rack: Finish the Job
Press the bar back to lockout. From lockout, press it back along the path it came, toward the rack. You should feel the bar make contact with the uprights before you lower it into the hooks. Don't search for the hooks with your eyes while the bar is in motion over your face. Trust the contact. Feel the uprights, lower together, smoothly.
A missed re-rack is dangerous. A sloppy re-rack damages your equipment and your confidence. Train it with the same deliberateness as every other part of the lift.
Your First Session Checklist
- [ ] J-hook height set so unrack requires a short press-out, not a stretch
- [ ] Eyes directly under the bar when lying down, not behind it
- [ ] Shoulder blades retracted and depressed before gripping the bar
- [ ] Natural arch present, not forced, not eliminated
- [ ] Feet flat on the floor, driving into the ground
- [ ] Thumbs wrapped around the bar, always
- [ ] Grip positioned so forearms are vertical at the bottom position
- [ ] Full 360° breath and brace taken before unracking
- [ ] Bar pressed out of hooks cleanly, not jerked
- [ ] Descent controlled, 2–3 seconds, bar tracking toward lower chest
- [ ] Bar touches chest, no bounce, no crash
- [ ] Press back along the same arc to lockout
- [ ] Fresh breath and brace for every single rep
A Word on Weight
Your first session: empty bar only. Twenty kilograms of movement pattern practice. Your nervous system is learning to coordinate a chain of muscle groups: feet to floor, legs to hips, back to bench, shoulders to bar, in a sequence it has never executed under load. Putting weight on that new pattern before it's grooved is how compensations get baked in. Those compensations take months to undo.
Master the empty bar. Make it look like a max effort attempt: precise setup, full brace, controlled descent, deliberate press. Then earn every plate. The lifters who progress fastest are the ones who used the empty bar to build an unmistakable foundation, never the ones who loaded the bar fastest in week one.
Key Takeaways
- The bench press is a full-body skill. Feet, legs, back, and shoulders all contribute before the chest ever contracts
- Set your shoulder blades first: retracted and depressed. Everything else in the setup follows from this
- The bar path is a slight diagonal, not straight down, not to the neck, not to the belly. Lower chest is the touch point
- The Valsalva brace is mandatory: full breath and locked brace before every single rep, re-breathe only at lockout
- Paused bench is a separate skill. Introduce it at moderate weight and practise it regularly from the start
Put It Into Practice
This week: Three sets of five reps on the empty bar, focusing exclusively on shoulder blade setup and the unrack. Retract and depress. Press out cleanly. Do this before you add a single kilogram.
This training block: Film every session from the side and from the foot of the bench. Verify your bar path and touch point on every working set. The camera shows what your body cannot feel, and what you cannot feel, you cannot fix.
Long term: Treat every warm-up set as a technique set. The shoulder blade setup, the brace, the bar path: these are disciplines you practise every session, at every weight, for as long as you lift, not habits you establish once.
References
- 1Elliott BC, Wilson GJ, Kerr GK. 'A biomechanical analysis of the sticking region in the bench press.' Med Sci Sports Exerc. 1989. PMID: 2779404
- 2van den Tillaar R, Ettema G. 'The "sticking period" in a maximum bench press.' J Sports Sci. 2010. PMID: 20373201
- 3van den Tillaar R, Ettema G. 'A comparison of successful and unsuccessful attempts in maximal bench pressing.' Med Sci Sports Exerc. 2009. PMID: 19812510
- 4Gomo O, van den Tillaar R. 'The effects of grip width on sticking region in bench press.' J Sports Sci. 2016. PMID: 26055260
- 5Lehman GJ. 'The influence of grip width and forearm pronation/supination on upper-body myoelectric activity during the flat bench press.' J Strength Cond Res. 2005. PMID: 16095407
Analysed by FINAL FORM AI. Your form, perfected.