Squat Technique Essentials: The Blueprint Behind Every Big Squat
The fundamental mechanics that separate a good squat from a great one.
By Dhiren Dunraj MSc
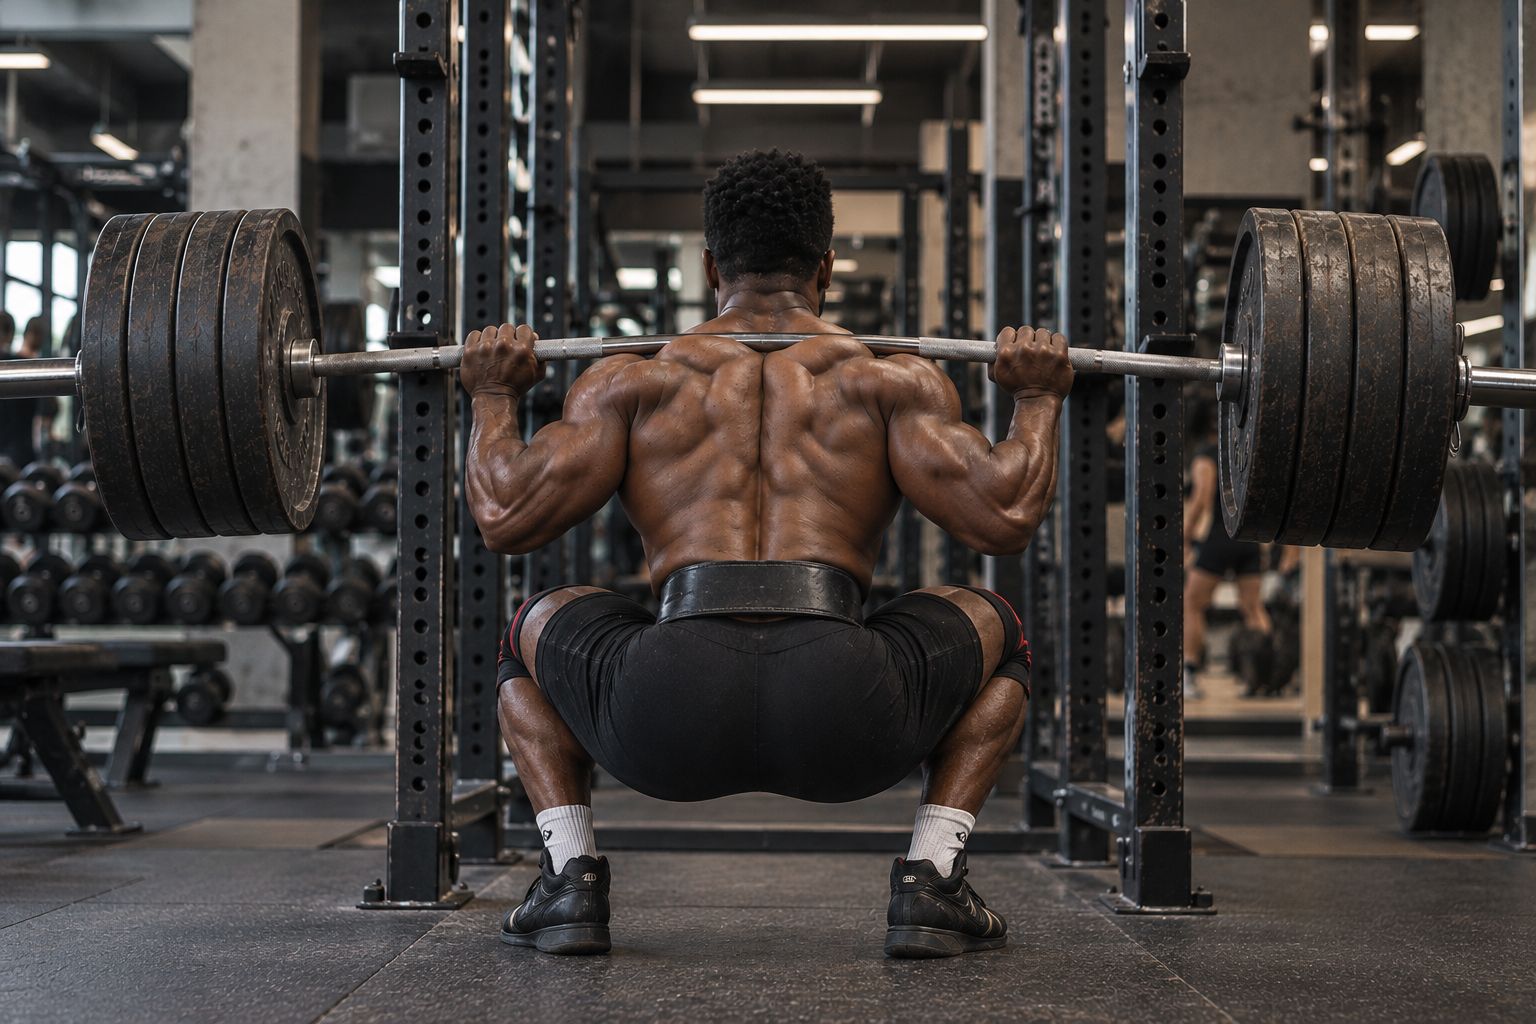
Key Insight
“The difference between someone who can squat and someone who squats is not measured in kilograms. It's measured in millimetres of precision, repeated thousands of times.”
Walk into a gym and watch the squat rack for twenty minutes. You'll see dozens of variations, wide stances, narrow stances, high bars, low bars, half-depth, full depth, knees caving, heels rising, bars sliding down backs. Most of it is error, not style, and the cause is rarely laziness or a lack of effort. It's the lack of a blueprint. Effort applied to poor technique builds a liability, not a squat. This is the blueprint. Study it. Apply it. Then film yourself and find the gap between what you think you're doing and what you're actually doing.
Stance Width: Your Anatomy Tells You Where to Stand
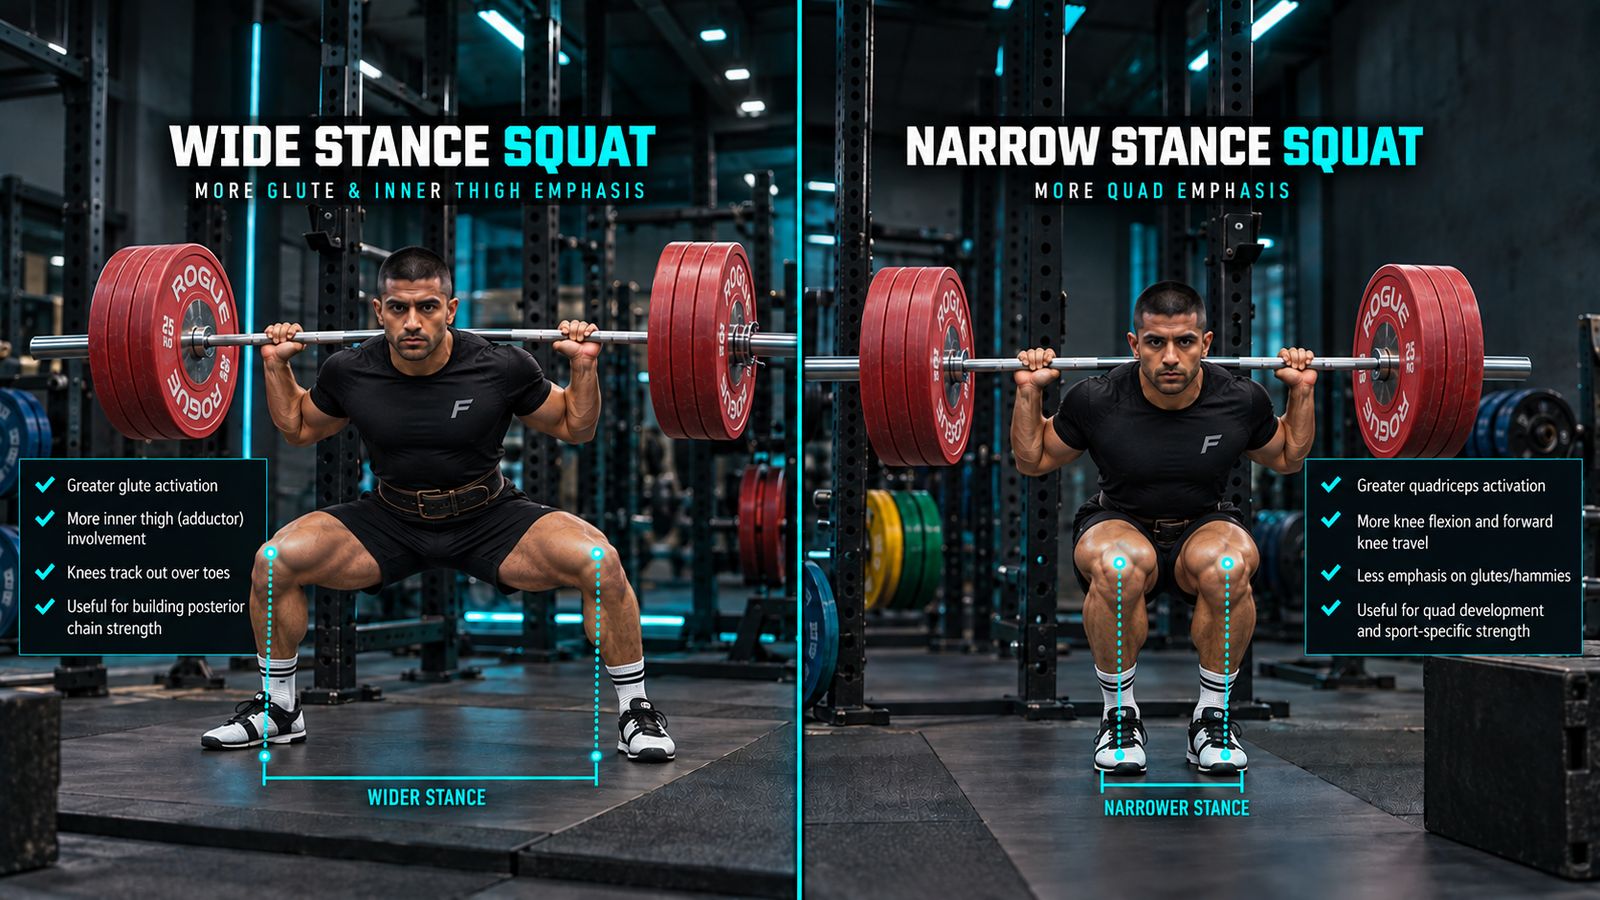
Stance width is a prescription written by your hip sockets, not a preference.
The hip joint is a ball-and-socket. The angle at which your femur sits in that socket, its natural orientation, determines the path your knee wants to travel as you descend. Fight that path and you'll know about it immediately: knees that cave, hips that grind, a depth that feels like you're being compressed rather than squatting. Those are anatomy signals, not technique failures.
Here is how to find your stance. Set up with no bar and no load. Stand with your feet at hip width, toes forward. Lower yourself into a deep squat. Feel where it stops. Now rotate your toes out fifteen degrees and try again. Then thirty degrees. Notice where the descent becomes fluid, where the knees track naturally over the toes, where the hips drop without grinding, where depth becomes available rather than forced. That's your stance, not your favourite powerlifter's.
A useful drill: the goblet squat. Hold a dumbbell or kettlebell at your chest, feet at your experimental width, and descend slowly. The front load keeps your torso upright and forces your hips to open into the bottom position. Where you feel balanced and fluid, that's anatomical compatibility. Where you feel compressed or twisted, that's your skeleton saying no.
Squat Biomechanics: Why Your Body Dictates Your Technique
The consequences of fighting your anatomy are predictable and consistent. Too narrow for your hip structure: knees cave inward (valgus collapse), hips can't clear, depth becomes near-impossible without compensatory forward lean. Too wide: adductors are on a permanent stretch, the hips lose stability, and the bottom position becomes a controlled fall. Optimal stance keeps the knees tracking over the toes throughout the entire descent, the hips opening freely, and the bar travelling vertically over the mid-foot.
Bar Position: Where You Put It Changes Everything
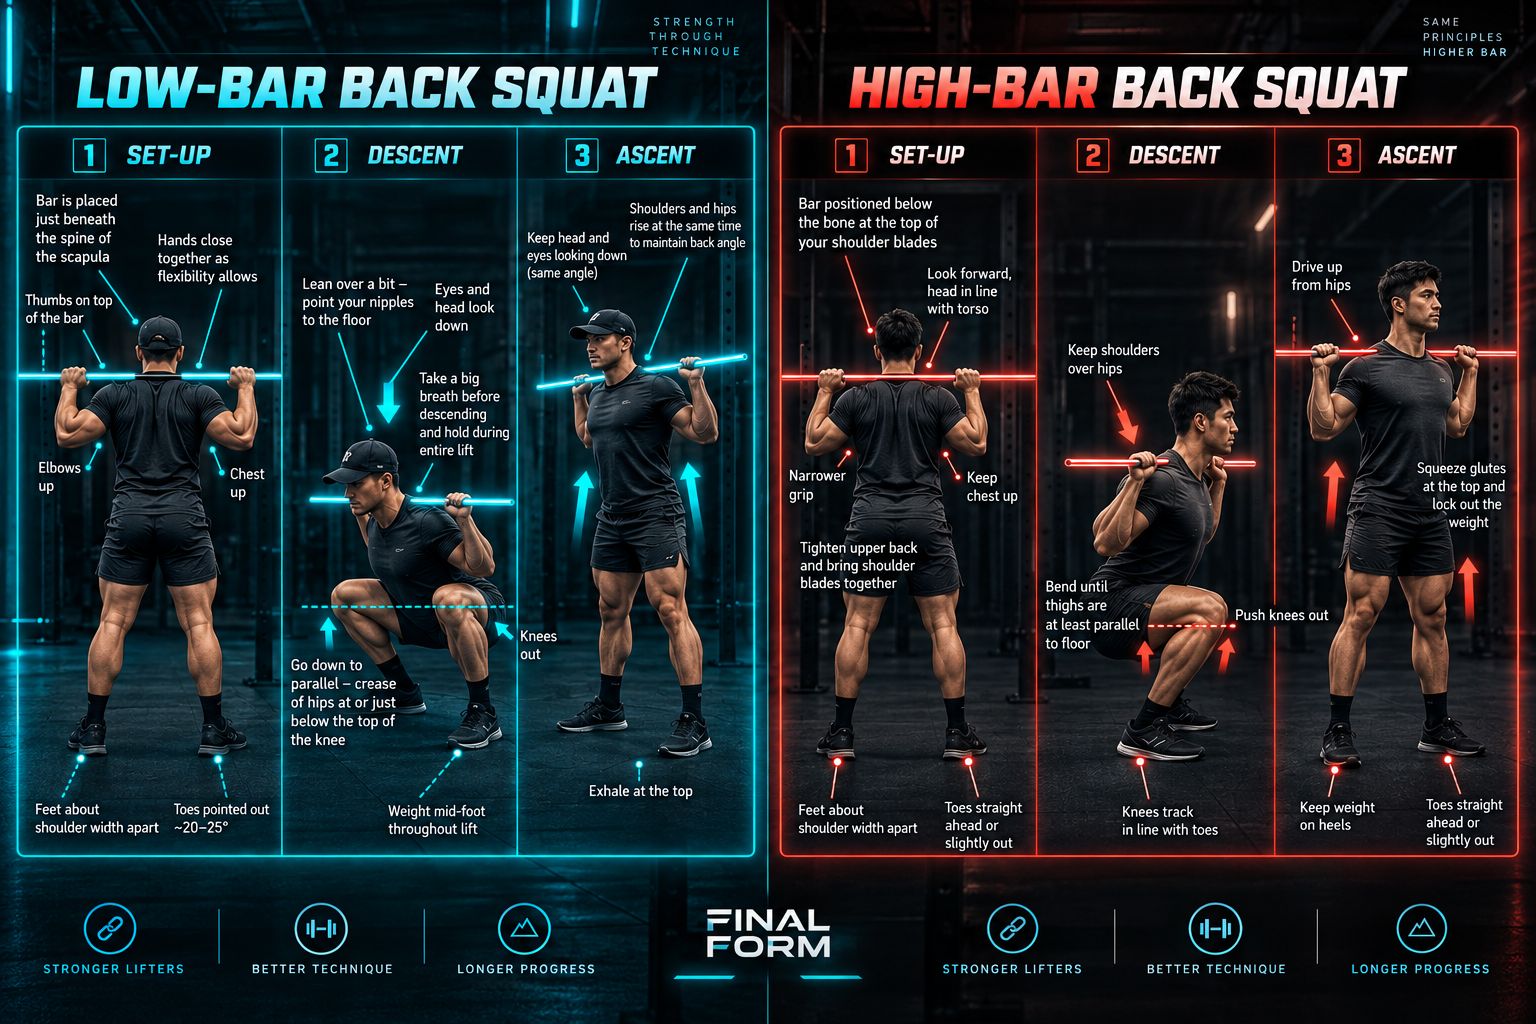
High bar and low bar are two different mechanical systems, not cosmetic variations. They load different muscles and demand different things from your body.
Imagine you're trying to push open a heavy door. If you push right next to the hinge, you need enormous force. If you push at the far edge of the door, far from the hinge, you need far less. That distance from the pivot point to where you apply force is the moment arm [1]. Longer moment arm, more mechanical advantage for the lifter, but more demand on the muscles at that joint.
In the squat, bar position changes the moment arms at your hip and knee simultaneously.
High bar: The bar sits across your upper traps. Your torso stays relatively upright. The moment arm from the barbell to your knee joint stays long, so your quads are doing serious work throughout the entire movement. Athletes with good ankle mobility and quad dominance often thrive here. Olympic weightlifters almost universally squat high bar because the upright torso is necessary to receive cleans and snatches.
Low bar: The bar drops to your rear delts, across the shelf of your posterior shoulder musculature. This shifts your torso angle forward. That forward lean shortens the moment arm at the knee (less quad demand) and lengthens the moment arm at the hip (more glute and hamstring demand). You're now loading the biggest engines in the human body: the posterior chain. Low bar lifters can typically handle more weight because glutes and hamstrings are, in most people, stronger than quads alone.
Neither is superior. The choice depends on two things: your anatomy and your goal. Long femurs and limited ankle mobility often direct a lifter toward low bar. The forward lean is unavoidable at depth, so working with it rather than against it is logical. Strong quad development, good mobility, and an upright squat preference may point toward high bar.
Whichever position you choose, the bar must be locked in place on muscle, not balanced on bone, and your setup must recreate it identically every single session.
Bracing Mechanics: The Hydraulic Cylinder
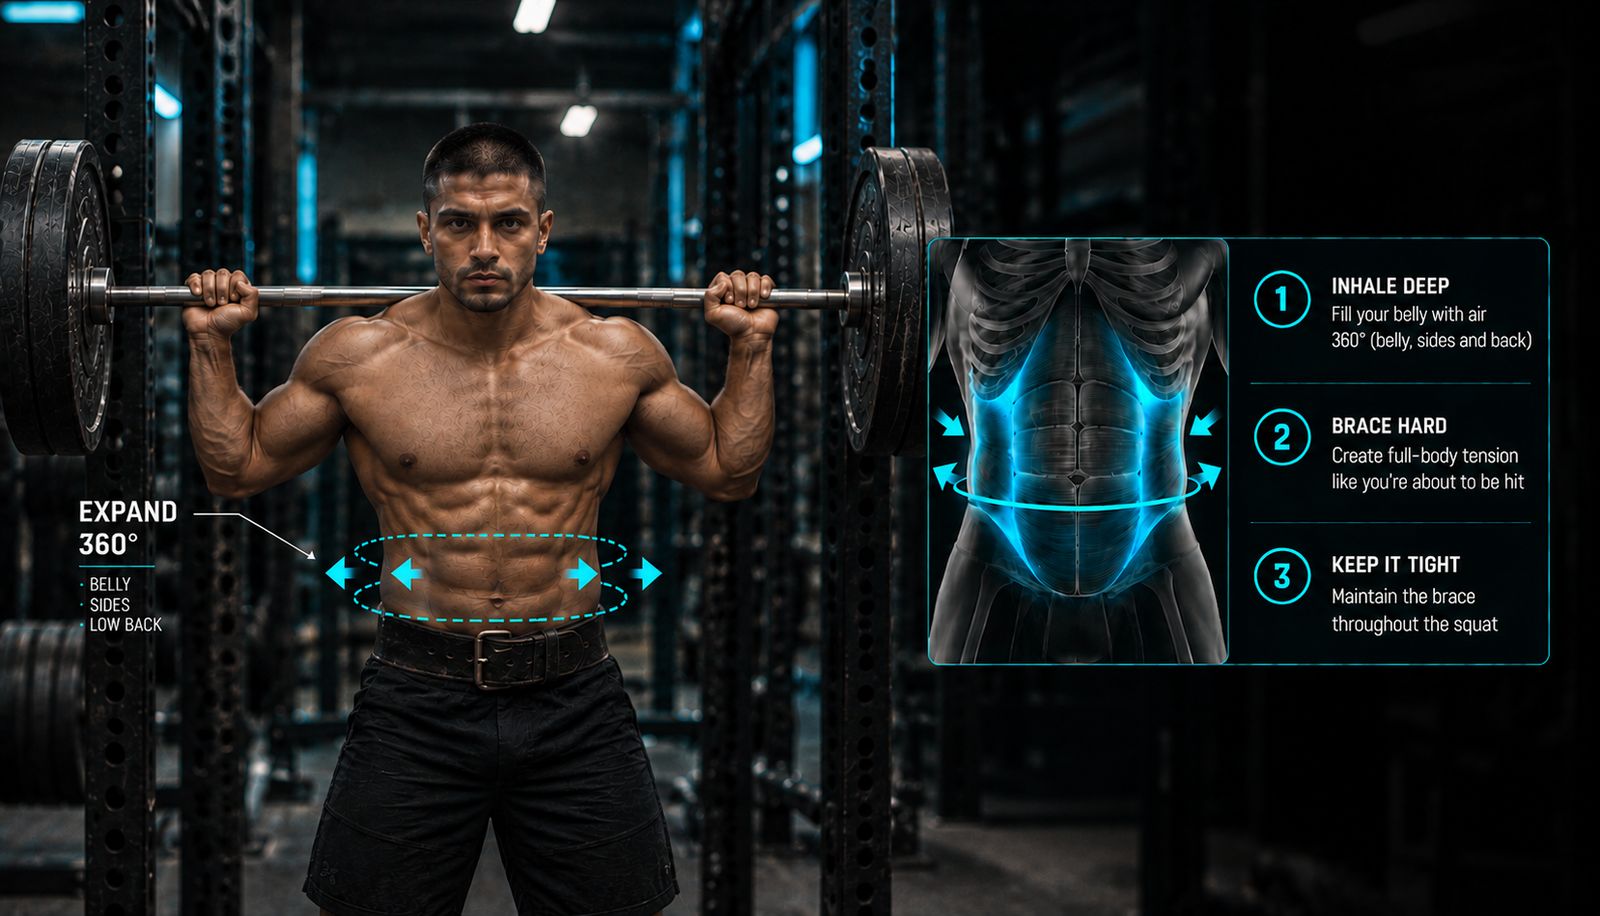
Your spine is a flexible column of stacked bones connected by soft tissue: discs, ligaments, muscles. Under a loaded squat, that column is under compression. A compressed flexible column buckles. That's physics. The way you prevent your spine from buckling under hundreds of kilograms is by creating a rigid cylinder around it.
That cylinder is intra-abdominal pressure.
The mechanism is called the Valsalva manoeuvre. Here is how to execute it correctly:
Take a massive breath, not into your chest, not into your upper lungs, but into your abdomen. 360 degrees. Your belly should press forward. Your obliques should press outward. Your lower back should press backward into where a belt would sit. All of this simultaneously. "Breathing into your belly" undersells it. You're inflating yourself in every direction at once.
Now brace. Imagine someone is about to drive a fist into your stomach. Contract everything, not just your abs, but your obliques, your erectors, the deep stabilisers surrounding your spine. Hold that contraction against the air you have just pressurised. Don't release that breath. Hold it for the duration of the rep.
This is why a belt works. The belt does not support you. It gives your pressurised abdomen something to press against, amplifying the intra-abdominal pressure you have already created. A belt on an unbrace is a wristband on a broken arm: decorative. A belt on a locked brace is the difference between a rigid cylinder and an even more rigid cylinder.
Every rep begins here, not just the heavy ones or the sets you're nervous about. Every single rep, from warm-up to max-day single, begins with a locked, 360-degree brace. The rep that injures people is never the one they were worried about. It's the one they took for granted.
The Walkout: Three Steps, No Negotiation
You have set your brace. The bar is on your back, loaded, waiting. Now you walk it out.
Three steps. One step back with your dominant foot. One step back with your other foot. A small adjustment to set your stance. Done. The bar is in position. You don't need four steps, a shuffle, or a round of adjusting and re-adjusting.
Every step you take after setting your brace is a brace degradation event. The muscular contractions required to step (the hip flexors, the stabilisers, the shifting weight distribution) all incrementally compromise the pressure you built. A four-step walkout is a worse brace than a three-step walkout. A five-step is worse again. Multiply this by five sessions per week, fifty weeks per year, over a decade of training. You have now taken thousands of compromised reps because you added one unnecessary step to your walkout.
Train the three-step walkout from your first session with an empty bar. Walk out, set your feet, go. Make it automatic at empty bar so it's automatic at max weight. The walkout should feel like a single practised action, not a series of decisions.
When the weight gets truly heavy, there is a natural instinct to take extra time, take extra steps, get more comfortable. Resist it. The walkout is not where you get comfortable. The brace is where you get safe. Get the bar out, set the stance, own the position, and squat.
The Descent and the Hole: Where Squats Are Decided
Break at the hips and knees simultaneously. Not hips first, that tips you into a good morning before you have descended an inch. Not knees first, that pushes your weight forward onto your toes and sends the bar in front of the mid-foot. Both joints break at exactly the same moment, and the descent begins as a controlled, unified movement.
As you descend, push your knees outward throughout the entire descent. The cue is "spread the floor" or "push your knees out over your toes." This external rotation activates your glutes and prevents valgus collapse. Valgus collapse is most common either at the very bottom of the lift or in the first third of the ascent, when the load is at its mechanical peak relative to your joint position.
The bar travels vertically over your mid-foot. This is the non-negotiable centre of gravity rule. If the bar drifts in front of your mid-foot, you're fighting a forward moment that your lower back will pay for. Keeping the bar stacked over the mid-foot is the entire purpose of your descent control, your hip hinge, your knee push-out, your forward lean. Every single technical element serves this one mechanical truth.
Descend under control. Two to three seconds down. Not slow enough to drain your strength (you need to arrive at the bottom with force available) but not crashing. Crashing into the bottom destroys positional awareness and teaches your nervous system that the bottom is a place to escape, not a position to own.
The hole, the bottom position, is where squats are won and lost.
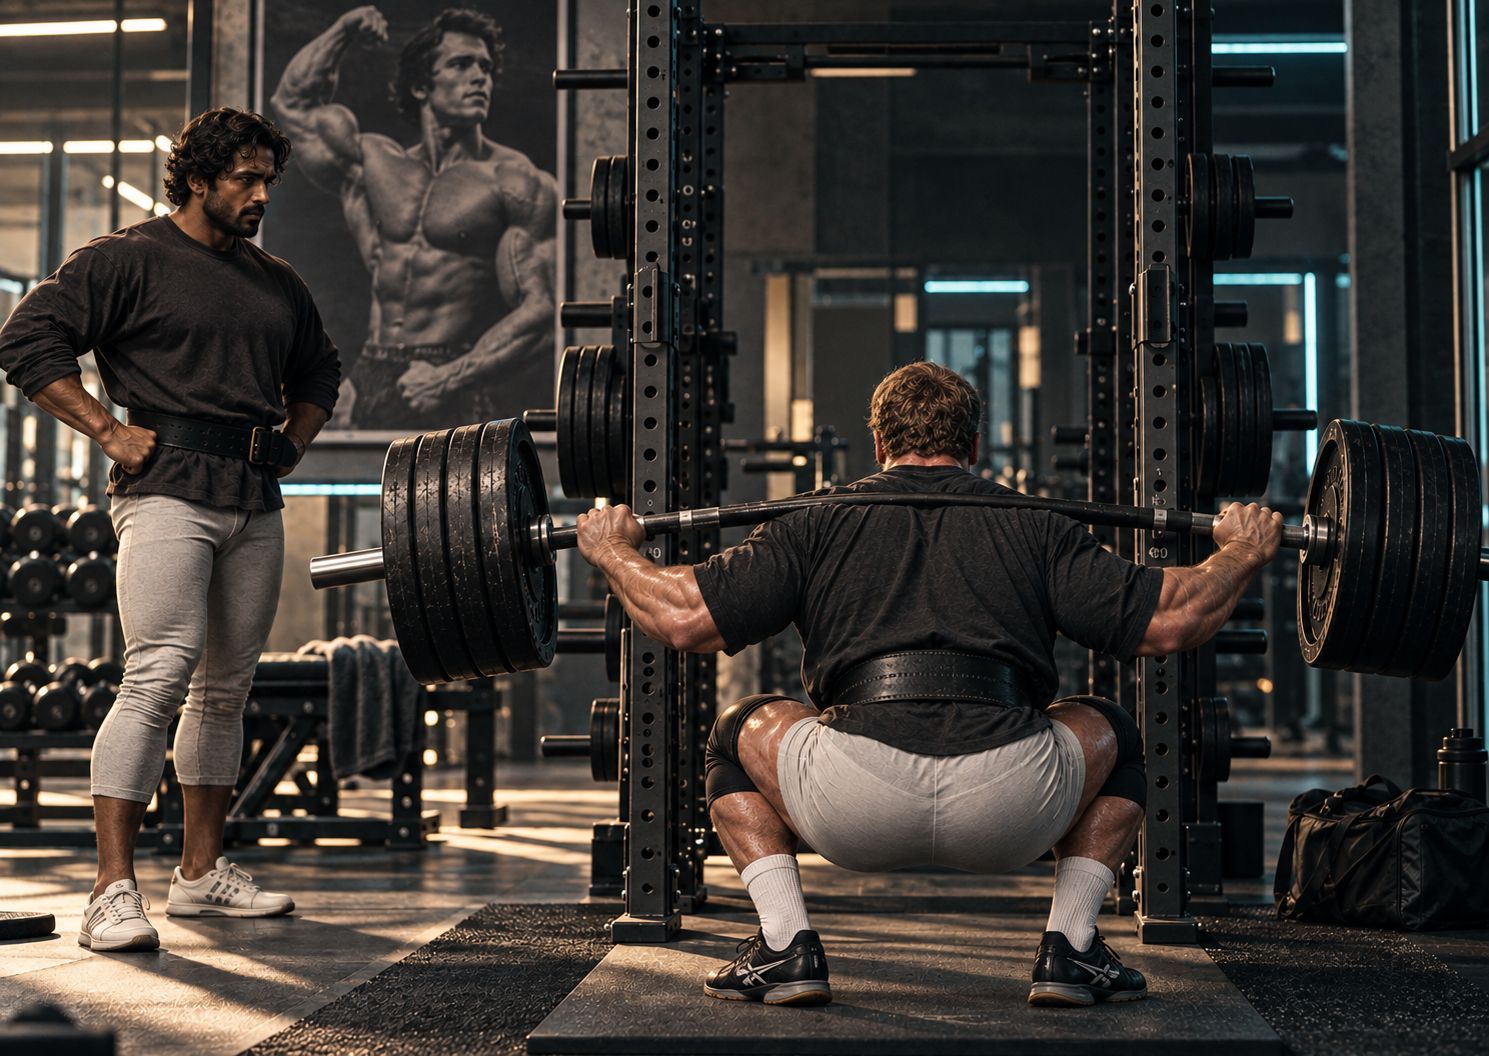
At full depth (hip crease below the top of the knee, no exceptions) your brace must be exactly as locked as it was when you unracked the bar. If you have lost your breath at the bottom, you have lost your primary spinal protection at the moment of peak mechanical demand. The hole is where spinal load is greatest and where the body is in its most disadvantaged lever position. A loose brace at the bottom is a dangerous error, not merely a technical one.
Don't bounce out of the hole. The temptation, especially as weight increases, is to use the stretch reflex, the elastic recoil of the muscles and tendons at full depth, to help initiate the ascent. Used skilfully by experienced lifters, a controlled reversal is fine. Used as a crash-and-rebound by a lifter without positional control, it's an injury waiting to happen. Control in. Drive out.
The Ascent and Lockout: Drive the Floor Away
From the bottom, one cue owns the ascent: chest and hips rise together.
If your hips rise faster than your chest, you have converted a squat into a good morning. Your legs have stood up while your torso stayed bent. The bar is now out over your toes, your lower back is taking a bending force it's not designed to sustain, and the weight that your legs should be lifting is being held up by your lumbar erectors. This is the good morning fault. It's the most common ascent error among intermediate lifters, and it doesn't announce itself politely. It's subtle (a few degrees of hip lead) until the weight is heavy enough to reveal it.
The cue that prevents it is "Drive your chest up," not "stand up" or "push through your heels." The intent of driving the chest forces the torso and the hips to rise as a unit, maintaining the bar's position over the mid-foot and keeping load distributed across the posterior chain and quads simultaneously.
Drive your knees out through the entire ascent. Valgus collapse does not only happen on the way down. It happens on the way up, right out of the hole, when the load is at its heaviest relative to your position. Push them out before they cave, not after.
Lockout: stand tall. Hips fully extended. Knees fully extended. Glutes contracted. Not hyperextended, since hyperextension at the top is a back compression event and a balance risk. Not leaning backward, since that's not lockout. It's a compensation for incomplete hip extension. Stand. Fully. Hips through, standing tall, bar over mid-foot, brace still held. Own that position for a full second before re-racking.
Common Squat Faults & How to Fix Them
Key Takeaways
Stance width is anatomical, not arbitrary. Use goblet squats and wall squats to find the width where your descent is natural, not forced.
High bar builds a more upright squat with greater quad demand. Low bar shortens the knee moment arm and recruits more posterior chain. Choose based on your anatomy and goal.
The Valsalva brace is a 360-degree pressurisation event: front, sides, and lower back simultaneously. Hold it for the entire rep, every rep without exception.
Three-step walkout only. Each extra step is a brace degradation event that compounds over thousands of training sessions.
The hole is where the squat is decided: brace locked, controlled descent in, controlled drive out. Never bounce, never lose the breath at the bottom.
Chest and hips rise together on the ascent. If the hips lead, the squat becomes a good morning and the lower back pays the bill.
Put It Into Practice
This week: Pick one technical element from this article and film your next session specifically to evaluate it. Brace quality, knee tracking, or ascent pattern: pick one thing, observe it on video, assess it honestly. The camera shows you what your proprioception hides.
This training block: Spend four weeks performing your first working set as a technique set regardless of weight. Before you add load, the technique must be automatic at 70%, because at 95%, your only option is the movement pattern your nervous system already knows.
Long term: Accept that your optimal squat stance, bar position, and descent pattern will look different from any other lifter's. Stop chasing aesthetics. Start chasing mechanics that are correct for your skeleton. The lifters who develop their technique over years of self-specific attention are the ones who are still squatting heavy at fifty.
Analysed by FINAL FORM AI. Your form, perfected.
References
- 1Escamilla RF. 'Knee biomechanics of the dynamic squat exercise.' Med Sci Sports Exerc. 2001. PMID: 11194098
- 2Schoenfeld BJ. 'Squatting kinematics and kinetics and their application to exercise performance.' J Strength Cond Res. 2010. PMID: 20182386
- 3Glassbrook DJ, Helms ER, Brown SR, et al.. 'A review of the biomechanical differences between the high-bar and low-bar back-squat.' J Strength Cond Res. 2017. PMID: 28570490
- 4Fry AC, Smith JC, Schilling BK. 'Effect of knee position on hip and knee torques during the barbell squat.' J Strength Cond Res. 2003. PMID: 14636100
- 5Hartmann H, Wirth K, Klusemann M. 'Analysis of the load on the knee joint and vertebral column with changes in squatting depth and weight load.' Sports Med. 2013. PMID: 23821469
- 6Hackett DA, Chow CM. 'The Valsalva maneuver: its effect on intra-abdominal pressure and safety issues during resistance exercise.' J Strength Cond Res. 2013. PMID: 23222073
- 7Swinton PA, Lloyd R, Keogh JWL, et al.. 'A biomechanical comparison of the traditional squat, powerlifting squat, and box squat.' J Strength Cond Res. 2012. PMID: 22505136