Deadlift Technique Essentials: Make the Floor Move
The mechanical principles that unlock a technically sound, injury-resistant deadlift.
By Dhiren Dunraj MSc
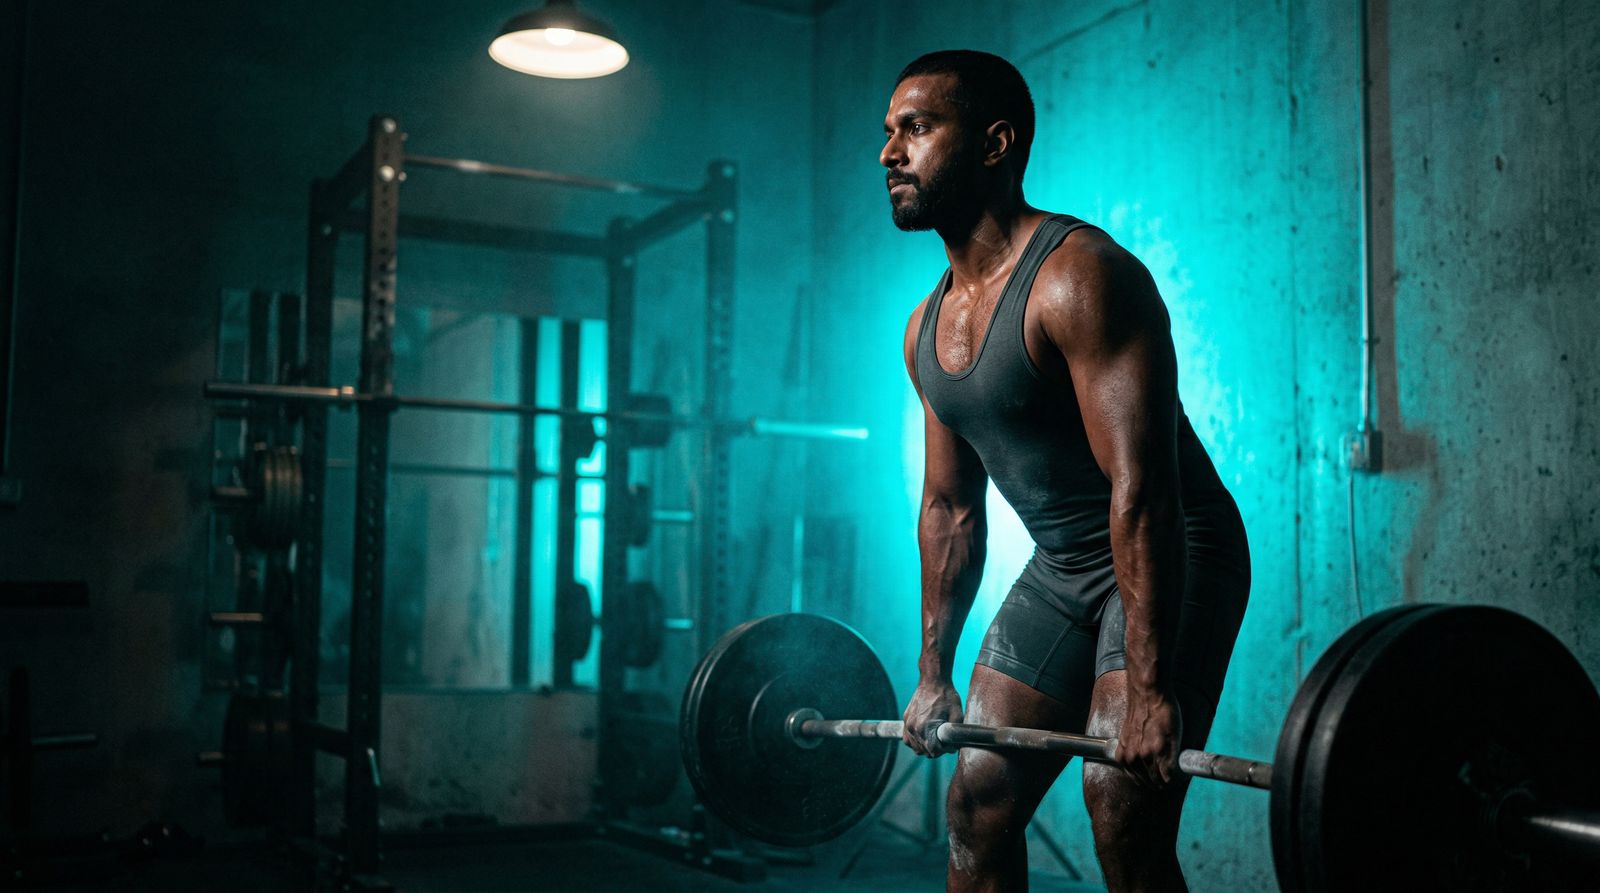
Key Insight
“The difference between a deadlift and a back injury is not the weight on the bar. It's the precision of the positions held under that weight.”
Most people's deadlifts look like a bar curling up from the floor, the hips rise fast, the lower back takes the load, and the bar swings forward. The elite deadlift looks entirely different. It looks like the floor is being pressed away from underneath a perfectly braced column of a human being. The bar travels vertically. The body is still. Only the distance between them changes.
The gap between those two images is technique: specific, learnable, practisable technique. This article breaks it down in full: the physics, the positions, the cues, and the mechanical distinctions that separate a deadlift that scales from one that stalls.
Bar Over Mid-Foot: The Geometry That Rules Everything
The bar must travel vertically, straight up from the floor to lockout. That is physics, not a technique preference.
Consider the geometry. The human body's centre of mass sits roughly over the mid-foot when standing. For the bar to travel in a straight vertical line, it must start at that same horizontal position, directly over the mid-foot. If the bar starts in front of mid-foot, it cannot travel vertically without first swinging back over the mid-foot, tracing an arc rather than a line. That arc is wasted mechanical energy. It also increases the moment arm at the hip for the duration of the arc, placing an elevated load on the lumbar spine before the pull has even found its most efficient path.
If the bar starts behind mid-foot, the lifter falls backward. The centre of mass is lost.
There is only one correct starting position: bar over mid-foot. Approximately 2–3cm from the shins when standing, before you push the shins forward to contact. After the setup (shins pushed toward the bar, hip angle established) the bar should be within 1–2cm of the shins. Any further and the arc fault is likely. Any contact with the shins before the hips are set means the setup sequence was performed out of order.
Film from the side on every session. Draw a vertical line from the bar. It should pass through the mid-foot. If it doesn't, the bar path on the way up will reflect that starting error.
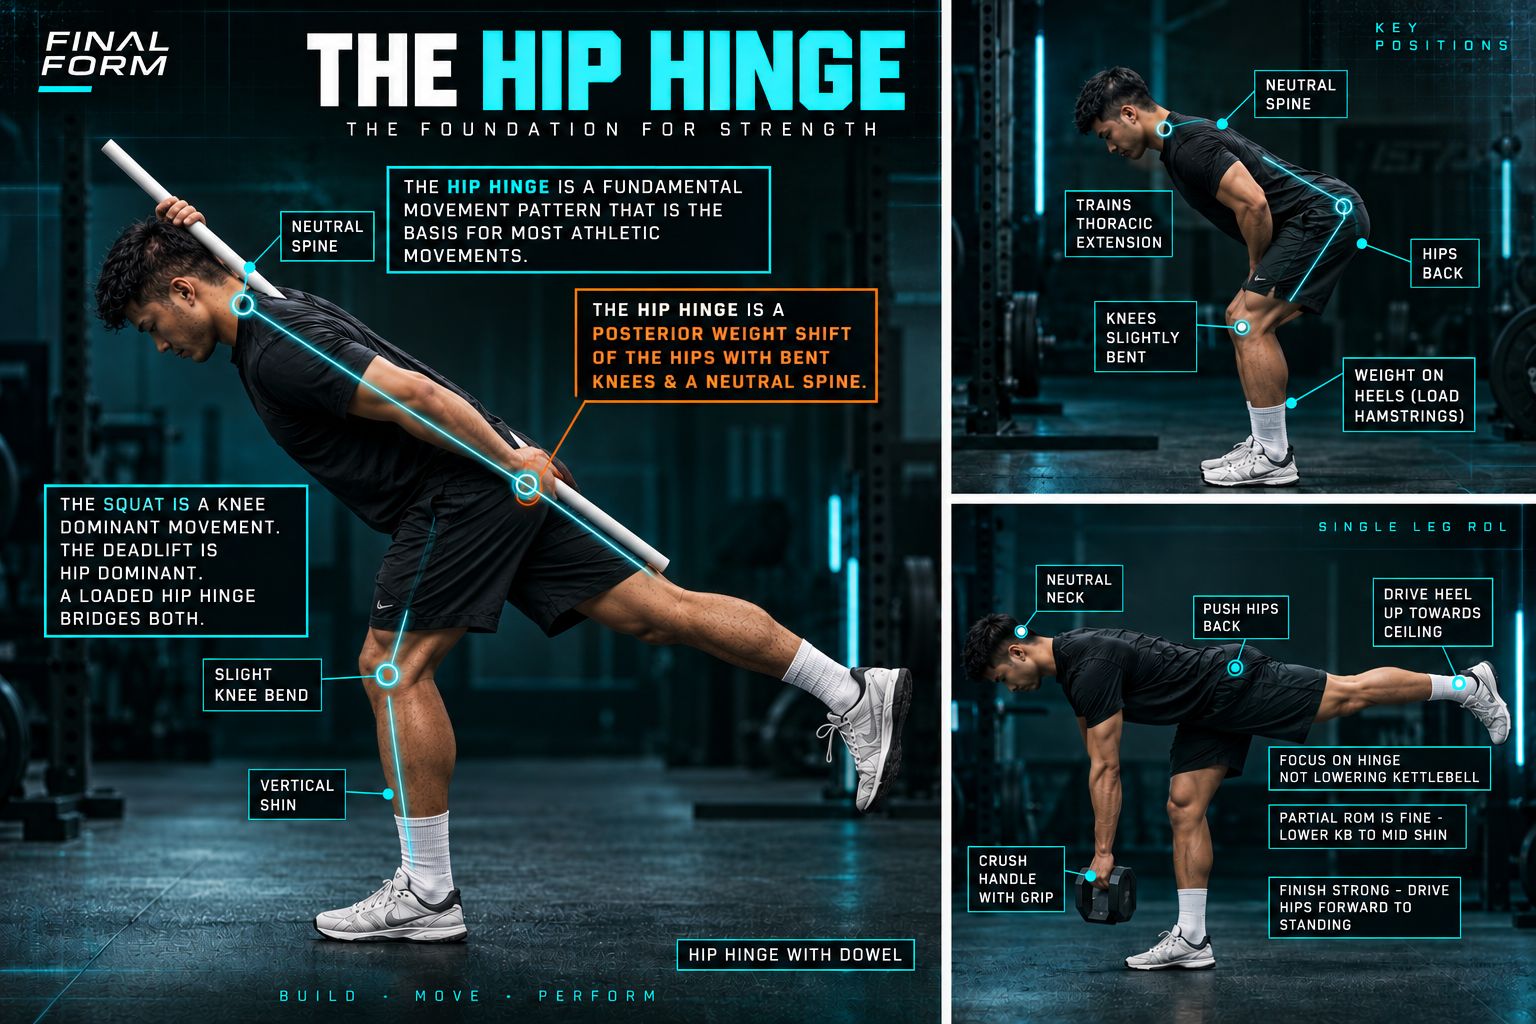
The Hip Hinge vs the Squat
The deadlift is a hip hinge. The squat is a squat. These are different movements with different mechanics, and confusing them in the deadlift is the root cause of the most common fault in the lift: the hips rising before the bar breaks the floor.
In a squat, the hips descend and the torso stays relatively upright. The shins travel forward significantly as the knee flexes deeply. The load is distributed substantially across the quadriceps. The hip joint and knee joint both move through a large range of motion.
In a hip hinge, the hips move backward. The spine maintains a neutral angle. The shins stay close to vertical. The load is distributed predominantly across the hamstrings and glutes (the posterior chain). The knee joint bends only enough to allow the hips to load correctly at the required depth.
A deadlift setup that looks like a squat (hips very low, shins nearly vertical from below the bar, torso very upright) will immediately reveal the fault when the pull begins. The hips are in the wrong starting position. They will shoot upward to find the correct hinge angle before the bar can move efficiently. What was supposed to be a leg drive becomes a back extension with the legs catching up. That's the classic "hips shoot up" fault, and it's a setup error, not a drive error.
The correct deadlift setup has:
- Hips higher than a squat but lower than a Romanian deadlift
- A back angle between 30 and 50 degrees from horizontal for most conventional pullers, varying significantly by proportions
- Shoulder blades directly over the bar
- Shins within 1–2cm of the bar
- Hamstrings under pre-tension: the sensation of a loaded hip hinge, not a neutral standing position
Set the hinge. Don't squat the deadlift.
Lat Engagement: The Detail That Saves Your Pull
The lats keep the bar on a vertical path, and when they disengage, the pull breaks down in a specific and predictable way.
The cue is "protect your armpits." Imagine someone is about to shove a stick up into your armpits from below. To stop them, you'd crush your arms against your sides and tighten your lats into your rib cage. That's the exact contraction you need before and throughout the pull.
The lats connect your upper arm to your lower back and pelvis. When they contract, they pull the humerus (the upper arm bone) close to the body. The bar hangs from your arms. If the arms are pulled close to the body, the bar is pulled close to the body. Close bar means vertical bar path. Vertical bar path means efficient pull.
When the lats disengage, usually when the lifter is under genuine effort and technique begins to degrade, the arms swing slightly forward. The bar drifts away from the body. The moment arm at the hip increases. The further the bar is from your centre of mass, the harder your lower back has to work to resist the torque. A bar drifting 5cm forward creates an exponentially larger problem.
Practise lat engagement off the bar. Stand with your arms at your sides and squeeze your lats. Feel the scapulae pull slightly downward and the arms press toward the thighs. That's the sensation. Replicate it with the bar in hand before every rep.
Sumo note: The wider grip in sumo means the arms are angled outward at setup. The lat engagement cue becomes "protect your armpits from the inside out," lats tight, pulling the bar inward and close against the elevated thigh position. The principle is identical; the geometry is slightly different.
Pulling the Slack Out: Conventional and Sumo in Detail
The most underutilised cue in the deadlift is also one of the most impactful. Pulling the slack out, loading the system before the bar breaks the floor, is what separates a disciplined pull from a jerk [1].
Conventional slack removal:
Take your grip, push your shins to the bar, set your hip angle, lock your brace. Now drive your legs into the floor without moving your hips. The bar will not leave the floor yet. It will flex. You will feel the tension travel through the bar into the plates. The weight stack will shift, the plates will engage the bar. In a quiet gym, you may hear a faint click from the collar region. When everything in the system is under tension, that's the moment to commit the drive.
The sequence: set → brace → pull slack → drive. Not set → drive. The slack removal is its own step, lasting perhaps half a second. Worth every millisecond.
Sumo slack removal:
The mechanics differ slightly. In sumo, the initial position has the hips more open and the shins at a greater angle outward. Pulling the slack out in sumo feels more like loading the hips and legs simultaneously. The force is more bi-directional (inward from the feet, upward from the legs) rather than the conventional lifter's more downward initial drive.
Find the feeling of the system loading, the bar flexing, the weight becoming live before it breaks the floor. That feeling is the difference between a pull that starts under control and a pull that starts with a jerk.
A jerk load is a sudden spike in compressive and shear load at the lumbar spine, applied at the exact moment the body is at its most mechanically disadvantaged position. Load the system. Then drive.
Conventional vs Sumo: Key Mechanical Differences

These two stances are different mechanical systems that recruit muscles differently, load the spine differently, and suit different anatomical proportions.
Hip angle and adductor demand: Sumo requires significant hip external rotation. The hips must open to allow the wide stance. This places the hip adductors under a very specific demand that conventional does not. The adductors in sumo are working in an elongated position and must remain strong throughout the pull. A sumo lifter with underdeveloped adductor strength will feel the inner thigh as a limiting factor. A conventional lifter rarely identifies the adductors as limiting.
Back angle and moment arm: Conventional tends toward a more horizontal starting back angle, particularly for lifters with longer torsos relative to their leg length. A more horizontal back angle means a longer moment arm between the bar and the hip, which increases the loading demand on the erector spinae as isometric stabilisers. That is a higher erector demand, not a danger in itself. Sumo tends toward a more vertical starting back angle due to the wider stance and more open hips, which shortens the back moment arm somewhat and reduces relative erector demand.
Quad vs posterior chain emphasis: Sumo places a higher demand on the quadriceps. The wider stance means the knees must push outward as the hips extend, and the initial drive off the floor has a greater knee extension component. Conventional places a higher demand on the hamstrings and glutes as the dominant hip extensors. Neither is "easier." They train different strengths.
Range of motion: Sumo typically has a shorter absolute range of motion for most body types because the wider stance reduces the distance the bar must travel from floor to lockout. However, this advantage is not universal. It depends significantly on limb proportions. A lifter with long legs and a short torso may find their sumo ROM almost identical to their conventional ROM.
Which is stronger: The one that suits your anatomy. For most beginners, this cannot be determined in a first session. The only honest way to find out is to spend several months developing competence in both stances and comparing.
The Initial Drive and Bar Path Through the Pull
The pull begins, not with a yank, but with an accumulating force that sends the bar vertically off the floor.
When the slack is out and the drive begins, leg pressure into the floor increases sharply. The bar breaks the floor and begins to rise. In the ideal pull, the bar stays within 1–2cm of the shins from floor to knee. Chalk on the bar reveals bar path. If the chalk is wiped across the front of the shins in a consistent line, the bar is tracking close. If there's no contact and the bar drifted forward, the pull has a problem.
From the knee to the hip, the bar transitions from a predominantly vertical leg drive to a hip extension finish. The hips drive forward, the posterior chain contracts to pull the pelvis to full extension. The back angle opens, the torso rises, and the bar arrives at lockout as a consequence of the entire chain working in sequence.
Sticking points reveal the weakest link. If the bar stalls just above the floor, leg drive or slack removal is usually the fault. If the bar stalls at the knee, the transition from leg drive to hip extension is poorly timed or the lat engagement has degraded and bar drift has increased the moment arm. If the bar stalls approaching lockout, hip extension strength is the limiting factor.
Each sticking point has a specific solution. Identifying where a pull breaks down is the first step to fixing it.
Lockout Mechanics: Hips Through, Not Back Bent
The top of the deadlift is misunderstood. "Hip snap" is the phrase. "Lean back" is the cue that causes problems.
The hips drive forward, not the back bending backward. The glutes contract hard, pulling the pelvis to full anterior extension. The knees lock out. The shoulders pull back slightly as the body reaches full extension. The bar is at hip height, hanging from fully extended arms.
Lockout is not lumbar hyperextension. The back does not bend backward at the top of a correct deadlift. The hips extend. The spine remains in a neutral position throughout. When a lifter "leans back" at the top, they're compressing the lumbar spine into extension under a heavy load, a different kind of stress from a rounded lower back, but still an error.
The cue is "drive the hips through, stand tall," not "lean back" and not "squeeze your glutes by bending over the bar." Stand. Full hip extension achieved by the hips moving forward into a standing position, not the torso moving backward over fixed hips.
Check your lockout on video. If your lower back is visibly arched past neutral at the top, this is the error. The fix is conscious hip drive forward rather than torso lean backward, and strengthening the glutes to achieve full extension without using back extension as a compensation.
Key Takeaways
Bar over mid-foot is geometry, not preference. It's the only starting position that allows a vertical bar path and must be verified by filming from the side.
The deadlift is a hip hinge, not a squat. The setup must reflect a loaded hinge with hips above a squat position and hamstrings under pre-tension.
Lat engagement ("protect your armpits") is a structural component of the pull, not an optional cue. When lats disengage, the bar drifts and the lower back pays the exponentially larger bill.
Pulling the slack out is a separate step before the drive. Loading the system prevents the jerk that spikes lumbar load at the worst possible moment.
Conventional and sumo recruit muscles differently and suit different anatomies. Neither is superior. Identify which suits your proportions through months of honest practice.
Lockout is achieved by the hips driving through to standing, not the torso leaning backward. A neutral spine at lockout is the goal.
Put It Into Practice
This week: Film your next session from the side. Before you review the reps, draw a vertical line from the bar's starting position. Evaluate whether the bar stayed on that line throughout the pull. One element of deviation (forward drift, backward lean at lockout, early hip rise): identify it and choose a single cue to address it next session.
This training block: Spend four weeks with a deliberate focus on slack removal. On every set, including warm-ups, take the slack out as a conscious, separate step before you commit the drive. Note whether your initial drive feels different, more controlled, more powerful. It will.
Long term: Accept that the deadlift is a skill that never stops requiring attention. The best pullers in the world are still refining bar path, lat engagement, and lockout precision every session. The technical ceiling on the deadlift is higher than most lifters ever get close to reaching.
Analysed by FINAL FORM AI. Your form, perfected.
References
- 1Escamilla RF, Francisco AC, Fleisig GS, et al.. 'A three-dimensional biomechanical analysis of sumo and conventional style deadlifts.' Med Sci Sports Exerc. 2000. PMID: 10912892
- 2Escamilla RF, Francisco AC, Kayes AV, et al.. 'An electromyographic analysis of sumo and conventional style deadlifts.' Med Sci Sports Exerc. 2002. PMID: 11932579
- 3Swinton PA, Stewart A, Agouris I, et al.. 'A biomechanical analysis of straight and hexagonal barbell deadlifts using submaximal loads.' J Strength Cond Res. 2011. PMID: 21659894
- 4Hales ME, Johnson BF, Johnson JT. 'Kinematic analysis of the powerlifting style squat and the conventional deadlift during competition: is there a cross-over effect between lifts?' J Strength Cond Res. 2009. PMID: 19910816
- 5Cholewicki J, McGill SM, Norman RW. 'Lumbar spine loads during the lifting of extremely heavy weights.' Med Sci Sports Exerc. 1991. PMID: 1758295